Tuesday, September 6, 2011

Easy Arrange Your Outdoor Planters

This week, I'd like to share a tutorial for an easy arranger that I made for my outdoor planters. This insert makes arranging greenry in the planters quick and easy and holds everything securely in place. 
The first step is to measure the inside of the planter to determine what size the arranger insert should be.....Using a planter with sloped sides, take a measurement towards the top of the planter, where the size is the largest and this will give you the 'ledge' to hold the arranger insert in place. After you have your measurement, you need to go in search of a container matching the measurement to use as a mold.


Materials you will need - A box of Plaster of Paris, disposable gloves, measuring tape, container to use as a mold that fits the measurement of the planter, 6 PVC pipe connectors (you can purchase at Lowes for 5 cents each), garbage bag cut in half with seams removed, a container for mixing.


Line the bottom of the container being used as a mold with the opened garbage bag and place your PVC connectors in the bottom, one in the middle and the other 5 evenly spaced approximately halfway between the edge and the middle. Mix the Plaster of Paris using the package directions. Because of the size needed, my mold was 13.5 inches wide, I had to use the entire box. I mixed half the box and poured in and then decided to use the entire box contents so that my insert would be about 1.5 inches thick. I was going for an insert no thicker than 2 inches so this worked out well for me...you will need to experiment with the amount of plaster to mix based upon the measurements of your container. Before pouring the mix in your mold, be sure and spray your garbage bag with water to help release after dried.


I let my insert cure overnight before I removed from the mold and carefully pulled away the garbage bag. As you can see, the edges are not perfect, but that is not an issue as the insert will be under your greenry or flowers and will not be seen.


Next, I turned the mold over and used a hammer to gently tap out the PVC connectors. Once I tapped them loose, I turned the mold back over and gently used a clockwise motion to remove the connectors.


Place the insert in your planter, here you can see how it rests on the sloping sides.


You then just insert your greenry anywhere in the 6 holes ...you can use any combination, or all of them to complete your arrangement.


If you want, you can cover the insert with moss or it could easily be spray painted a dark color to help it blend into the planter.


Now that I have my insert in each planter, it will be very simple to remove the current arrangement and replace whenever I want. If you live in an area where your have really windy weather, you can use a wadded up plastic bag or paper to stuff in each hole with your greenry stem, to make sure it fits securely. (Repost from 2009)

Linking to the following parties.  Please be sure and click the links to visit each one.

Anything Related
Just Something I Whipped Up
Home Sweet Home Party
Feathered Nest Friday
Show and Tell Friday
Hooking Up With HOH
The Idea Room

All the best,

Pin It!

Wednesday, August 31, 2011

Kitchen Sideboard

A vignette on my kitchen sideboard, bringing in a deep red in the florals with a rustic basket.  I matched a group of silver candlesticks, because silver looks good with anything and I like to keep a little bling in the mix. 


As I continue to finish the small jobs and detail on my kitchen remodel, this wall will have a flat screen TV for viewing from the breakfast area.  For now, the wall is blank so you can just let your eye wander past the empty space.


Joining Marty at A Stroll Thru Life for Tabletop Tuesday

Image and video hosting by TinyPic


Pin It!

Friday, August 26, 2011

Jar Cake Desserts

I recently hosted an all day Scrapbook party.  Everyone was invited to begin at 10am and I determined we would have lunch around noon with snacks through out the day.  I wanted to have my lunch completed with minimal prep, so I could spend all my time with my guests.  Sub sandwiches are easy and we have done that in the past, so I decided on something warm.  I made spaghetti, salad and garlic bread for an entree since I knew we would be taking a break from scrapbooking as we ate and wouldn't have to worry about messy food.  I prepared the spaghetti before everyone arrived and kept it in the Crockpot on warm so that it was ready to serve when we were ready to eat.  I made the salad and stuck in in the fridge, so all I had to do to finish and get everyone eating was to bake the garlic bread.  For dessert, I wanted something that would do double duty and work for dessert after the meal, as well as a snack for later in the day. The dessert needed to be easy to serve and of course, tasty.  As I thought of possible options, I also decided I wanted to provide at least two choices.  I decided to serve two cake options using a frozen poundcake and serving in Mason jelly jars.  I prepared a strawberry shortcake and an ice cream cake dessert. 


Strawberry Shortcake
Sara Lee Pound Cake (or a homemade or deli poundcake)
Strawberry Gel
Fresh Strawberries
Whipped topping
Layer cake, strawberries, gel and whipped cream into a mason jelly jar.  Continue layering until jar is full.  Place in refrigerator until ready to serve.  Serve with a spoon.


Ice Cream Cake
Sara Lee Pound Cake (or a homemade or deli poundcake)
Ice cream of your choice (I used Breyers Blast Waffle Cone)
Chocolate syrup
Caramel topping
Whipped topping
Layer cake, ice cream, toppings and whipped cream into a mason jelly jar.  Continue layering until jar is full. Place in freezer until ready to serve. Serve with a spoon.


These desserts are very simple but make a cute presentation.  Best of all, they have an extremely quick prep time while being tasty, tasty, tasty.  There are many variations that you could use for the jar cakes and are only limited by your imagination.  These desserts can be made ahead and kept in your refrigerator for 2-3 days for the Strawberry shortcake or for the ice cream dessert, these could be kept for up to a week or longer.  Great after school snacks, if you want to sugar the kids up.

Parties that I am joining today with thanks to all the wonderful hosts.  Please visit. 

Full Plate Thursday

Foodie Friday

Just Something I Whipped Up

Home Sweet Home

Feathered Nest Friday

Show And Tell Friday


Image and video hosting by TinyPic

Pin It!

Thursday, August 25, 2011

World's Largest YardSale 2011

I was a bit disappointed in the World's Longest Yardsale this year.  The Yardsale is an annual event that stretches along the 127 Corridor for 675 miles from Hudson, Mi to Gadsden, Ala.  We always take off on Saturday morning early and go as far as we can during the day...maybe next year, I'll take some time off work and we can travel farther on the Corridor to see differant vendors. 


I bought a couple copper jello molds from an 80 year old woman who had set up a booth at her home with her husband.  She said this would be her first and last yardsale.  She was setting her yard sale up like my Mom does.  My Mom is also in her 80s.  She was constantly rubbing on things to keep them clean and as a result, she was just worn out.  My Mom will work for days to wash and dry all her glass items and she is constantly cleaning things up throughout the sale.  She absolutely cannot stand to see something with a little dust on it.    Thank goodness she only likes to have a yardsale once yearly. 

There is one lady who has a booth every year that I always visit and buy a sign or set of boxes for Halloween decorating.  I bought a sign this year and will have to find just the right place for it in my Halloween decor. 

I found a three tier metal shelf for $5 that I will use for scrapbooking supplies and a set of green trees from Dept 56 for $1 that I will use with my North Pole Village. 


There were a lot of things that I might have brought home for the right price, however, I felt that most folks were really pricing their items in the ridiculous range this year.  When I go to a yard sale, I am looking for a bargain and I didn't find many of those this year.  Did anyone else participate in the Sale  or shop during the long weekend sale?  Did you find any great bargains or did you find that most things were way overpriced? 

Joining Alphabe-thursday.  Please click the link for a visit with Jenny.
Image and video hosting by TinyPic
Pin It!

Friday, August 5, 2011

Chicken Braid Solves What's For Dinner

I don't know many of us that aren't busy over the edge these days.  I love cooking and baking, but only on my own terms.  If I am 'forced' to produce a big meal, it takes the fun right out of it.  If I can have the time to think the food through and be prepared, that's another thing.  I like quick and easy recipes when a lot of cooking is involved, so that I don't have to spend a lot of time seperately, on each dish.  When I entertain, I usually cook farmhouse style, where one meal consists of at least two entrees, several side dishes and two or more desserts.  If you come to my table, you don't have to like everything prepared, but you better have some food on your face and a big smile when you push back.  An Unappreciated Cook has a cleaver nearby. 


This  Chicken Braid is the epitome of quick and easy but makes a very delicious and elegant presentation.  This recipe is from a Cooking Show on the ALN Network that I stumbled across recently.  The only stressful or time sensitive piece in this recipe is remembering to thaw the breaddough. 


Chicken Braid

Bread Dough Loaf, thawed (I use Rhodes)
2 Chicken Breast, cooked and shredded (or, use canned Chicken Breast or rotissere chicken from your Grocer's Deli
1/2 cup Thousand Island Dressing
1 egg beaten with one Tbsp water

Place bread dough on a floured board and roll until you have a thickness less than 1/2 inch....you should have a rectangle of dough that measures around 12x15 inches.  Spoon your chicken in the middle of your dough end to end the length of the dough, leaving about an inch on each end.  Squeeze or spoon the dressing over the chicken.  Take a knife or pastry blade and cut the dough on each side of your filling, in approx 1 inch widths....cut in from the outer edge to about 1 inch of your filling on each side, as well.  Don't cut all the way to your filling or you will have a leaky mess when you bake.  Your cuts don't have to be perfect, so don't worry about keeping each side perfectly even.  Beginning at one end, wrap up the end to lay over your filling and then take the first 1 inch cut of dough on one side and fold it over the filling...next, take the first 1 inch cut of dough on the other side and fold it over the filling and the end of the piece you folded from the other side.  Continue to  'weave' until you get to the last two 1 inch cuts on each side.  Fold up the end of your braid and then continue to 'weave' your last two 1 inch cuts on each side.  Brush the braid with the egg wash and bake in a 350 degree oven for 25 mins or until golden brown. 


The written description sounds timely and complicated, but it is really very simple.  I apologize for not making pictures of the step by step, which probably would have helped to illustrate.  If you have any questions, let me know.   Clicking on the pictures will make them larger.

I'm joining the following parties.  Please click on the links below to visit these sites and be sure and stop and say hi.

Foodie Friday

On The Menu Monday

Hooking Up with HOH

It's A Hodgepodge Friday

Image and video hosting by TinyPic
Pin It!

Thursday, August 4, 2011

Pigeon Forge Pretties - Traveling With My Guy

My Guy and I just celebrated our 36th Anniversary with a trip to our favorite getaway destination, The Smoky Mountains.  We went for total relaxation, so we enjoyed some window shopping and meandering.

We always ride the strip in Pigeon Forge when we arrive, to see what has changed since our last visit.  This has been a busy year and we have not been able to visit for quite a few months.  There were a couple new restaurants and one new attraction.  The Tomb - located in Walden's Landing.. 


Of course, loving all things Egyptian, I had to check it out.  We decided to wait for the rest of the family to actually partake of the attraction, but we did check out the lobby. 


The new movie theatre at Walden's Landing is now open, so we decided to see the movie Cowboys and Aliens...we love a good Western and we really enjoyed this movie. 


The Alien portions are not overdone and we found the movie to be refreshing and entertaining....Mike, who is not a big movie goer, even said it was the best movie he had seen in a long time. 


We visited the Harley Davidson store and bought some more shiny stuff and really, really soft cloths so that Mike can continue to polish the paint off of his new Streetglide....I don't know if I mentioned, but his Softail Classic was stolen a few weeks ago as he was attending a downtown blockparty event.  Just in case you don't speak motorcycle, both the Streetglide and Softtail Classic are types of motorcycles....I wouldn't know that if I did not have a husband who absolutely loves them. 

Any visit to Pigeon Forge must include a visit to The Christmas Place.  We all know how hot it has been here in Tennessee as well as many places around the Country.  Take a look at this picture and you can see how the North Pole folks are dealing with the heat.


Right about now, 5 cents for a snowball sounds like the best deal ever....give me a $1 worth, please.


Stepping through the door into the North Pole, we find it much cooler....look how happy Santa is standing beside a snow covered tree. I'm seeing lots of these flocked trees this year and looks like they are going to be very popular...I've been thinking about getting one for the last couple years.  This might be the year for a new tree. 


I love what they can do with styrofoam to make the displays look so gorgeous. 


I love this tree in a wagon...I don't know why but I just think it is so stinking cute. 


I love the glass shelves resting on cylinder glass containers filled with faux candies.  This would be a great idea to adapt to a Holiday buffet table.  On a smaller scale, this could be used for a beautiful themed dessert display or risers for a food buffet.   


I hope you enjoyed sharing our trip...now, let's play a game and enjoy the rest of the day. 

Joining the following parties:

Alphabe-Thursday

Home Sweet Home

Open House Party

Show and Tell Friday

Feathered Nest Friday


Image and video hosting by TinyPic
Pin It!

Wednesday, August 3, 2011

Some Folks Are Getting Ready......For Fall

I received my first Fall related magazine over the weekend.  The latest Celebrate featuring Fall.

What's more fun than a late evening get together in the cooler night air.


This looks like a yummy hot beverage to try....prep time is almost nothing.


I'm not trying to rush Summer away....I certainly don't want to lose any time by wishing it away but, I do love the Fall Season and enjoy seeing all the ideas and gorgeous pictures from the magazines as they come out.  I have not seen Halloween items in the stores yet, but it's been a couple weeks since I've been shopping so they may be out and I just don't know it.  Anyone seen any Halloween displays yet?


Image and video hosting by TinyPic
Pin It!

Tuesday, July 19, 2011

Cloche Party With Our Marty

It's time for a Cloche Party with our host Marty...that so rhymes!!  Love me a party and love me some cloches, so here are my offerings for this party season.  Hope you enjoy!


Dual Glassy Beauties, lined up and decked out in green goodness.


Fler De Lis is always a classic and just that much more lovely under glass.


Living Room Vignette that you might already have seen but thought I would post again in case you missed it.  I love my white artichoke.  The Bee cloche is my first and favorite.  I found it at a yard sale for one dollar.  I consider it one of my best finds.


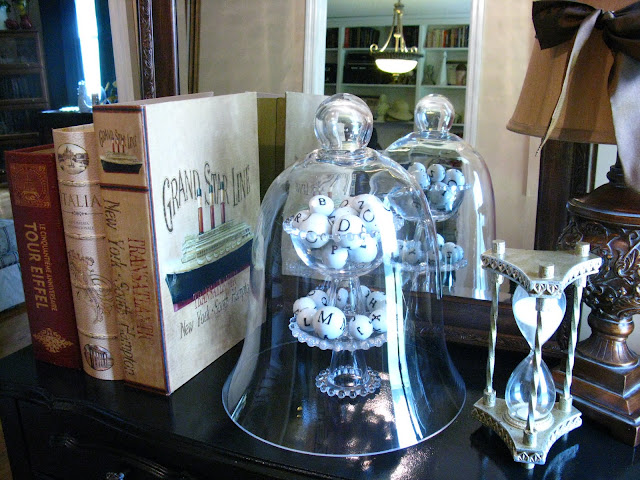
I found this huge cloche at Home Goods a few months ago.  It is a mammoth at 15 inches tall and measures 12 inches across. 


Edited to add note: As I am now viewing my post to ensure it looks as I expected...I find that the lovely Titanic book still has the sales sticker on it...color me red and just close your left eye so you don't see that. 

My collection of pastry stands filled with this and that for a welcoming display on the dining table.


I found this cute little metal bird on a rock at Cracker Barrel last fall...he has a brother around here somewhere.


You can't have a cloche without a chicken ( I just made that up) so here is my required chicken shot.


Please visit Marty at A Stroll Thru Life and bask in Cloche Heaven on Earth.  Come back and visit anytime. 

Image and video hosting by TinyPic
Pin It!